My 2nd Indie Designer GAL FO is a pair of Sweet Little Mini Cuffs by SarahJaneDesigns. This is a crochet pattern! Part of my ongoing quest to improve my hooking skills has me trying to be a bit braver - branching away from flat granny square type projects and trying some new things.
Little they may be but I actually learnt so many new techniques while making these. SarahJane writes a nice clear pattern and best of all includes links to youtube clips showing how to make the various crochet stitches in this pattern...perfect for an adventurous beginner such as myself.
If you click through to the original pattern, you will notice my version is missing the laceweight edging. I tried a couple of different laceweights I had on hand but nothing was quite the right colour and I ended up ripping out the lace, working another row in DK to add some height and then calling it good. I think they have a bit more of a modern vibe to them without the lace.
Yarn is Tri'Coterie DK Sparkles in Black Pearl. I used a 4mm hook.
Sarah Jane is an downunder designer who has some really neat crochet designs. If you're a steampunk fan there are a few of her patterns which might inspire you. Happy Hooking :)
Thursday, November 28, 2013
Saturday, November 23, 2013
FO: Little Spare Time.
One of the best things about participating in the Ravelry Gift-Along is finding lots of new-to-me designers and hence lots of new patterns to queue and favourite!
On the hunt for a suitable sweater pattern to knit our 2yr old nephew for Xmas, I found Little Spare Time by Terri Kruse. Terri has some amazing designs - from adult sweaters (including a grown up version of this pattern), to shawls and hats and other accessories. I really felt drawn to her design aesthetic and Little Spare Time was a pattern that fit my need for something relatively easy and quick to knit, but still being stylish and that 'little bit different'. I think it looked like an easy to wear sweater for an active toddler, and I really liked the buttoned up shawl type collar.
I used some Bendigo Classic 8ply in "Tasman". This is my first time using this particular yarn and it has an almost crepe like appearance. It was a little bit splitty and not my favourite yarn I've ever knit, however it blocked really well and this smoothed out any uneven stitches (I found the crepe made these areas really obvious so I am glad the blocking fixed it). I also think it would make a good hardwearing yarn for kids.
To make my sweater a bit more interesting I grabbed a ball of black crepe yarn from Spotlight and did a contrast collar. Unfortunately 50g wasn't enough for my initial plan of doing a contrast colour for the collar, pocket linings and all the garter hems - in fact I had to modify the collar a little bit so I didn't run out of yarn! It's been awhile since I knit something this size so obviously my yarn estimating abilities are a little bit off! I am still happy with how the collar looks though but it's just a bit smaller than the designer intended. I also found some cute pirate buttons at Spotlight which finished it off perfectly.
I made short sleeves as I am gifting this for Christmas which falls mid summer for us - in the hope this will be a good transitional/autumn sweater. I just hope Mr A likes it!!
More details on my Ravelry project page: http://www.ravelry.com/projects/sweetp/little-spare-time-kal
I used some Bendigo Classic 8ply in "Tasman". This is my first time using this particular yarn and it has an almost crepe like appearance. It was a little bit splitty and not my favourite yarn I've ever knit, however it blocked really well and this smoothed out any uneven stitches (I found the crepe made these areas really obvious so I am glad the blocking fixed it). I also think it would make a good hardwearing yarn for kids.
To make my sweater a bit more interesting I grabbed a ball of black crepe yarn from Spotlight and did a contrast collar. Unfortunately 50g wasn't enough for my initial plan of doing a contrast colour for the collar, pocket linings and all the garter hems - in fact I had to modify the collar a little bit so I didn't run out of yarn! It's been awhile since I knit something this size so obviously my yarn estimating abilities are a little bit off! I am still happy with how the collar looks though but it's just a bit smaller than the designer intended. I also found some cute pirate buttons at Spotlight which finished it off perfectly.
I made short sleeves as I am gifting this for Christmas which falls mid summer for us - in the hope this will be a good transitional/autumn sweater. I just hope Mr A likes it!!
More details on my Ravelry project page: http://www.ravelry.com/projects/sweetp/little-spare-time-kal
Monday, November 18, 2013
Wayside
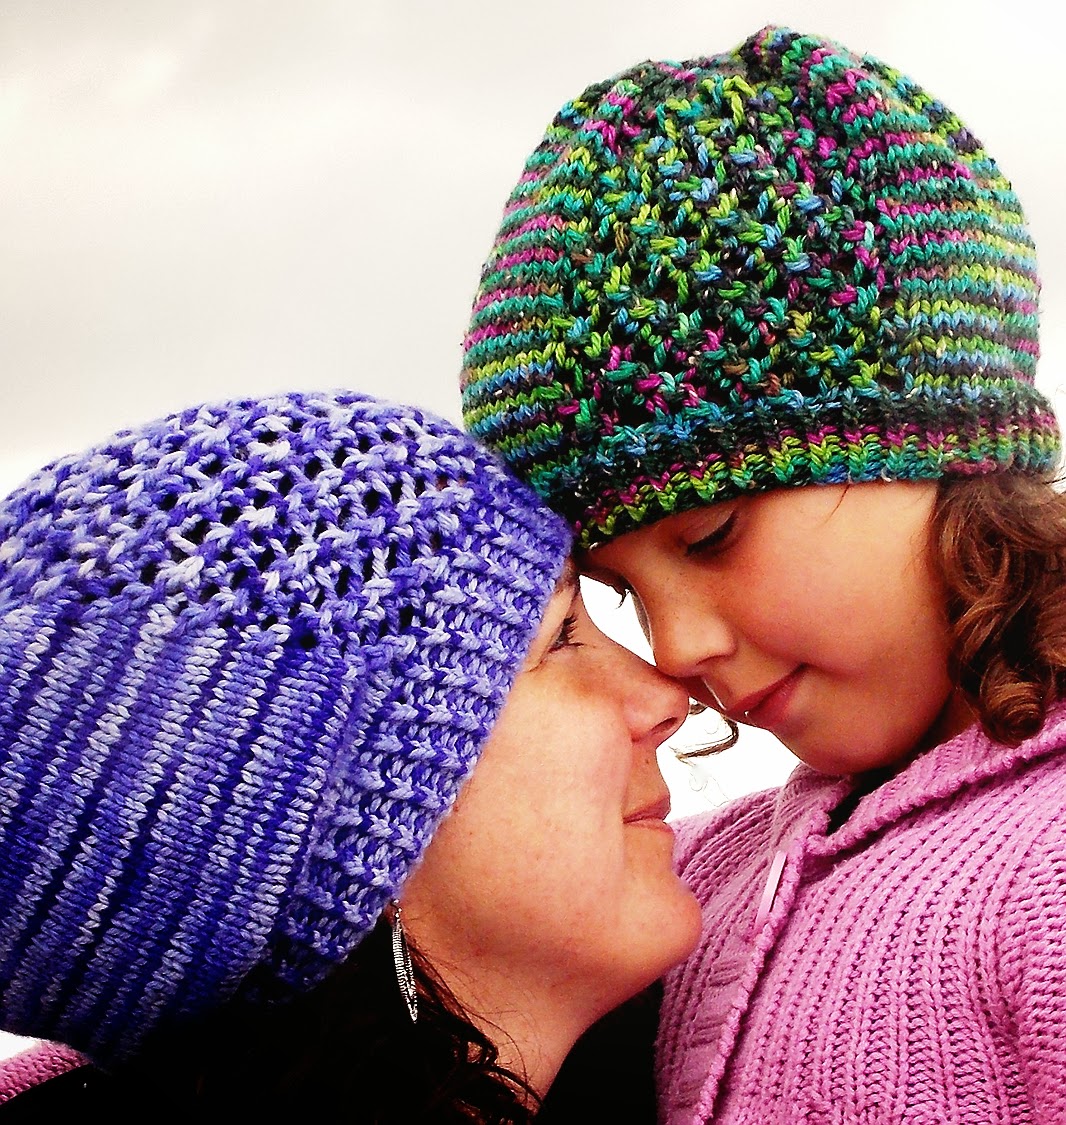
Wayside is a new pattern release from me. A slouchy Aran weight hat with a feature lace panel. This is the third hat in a collection exploring diagonal stitch patterns (hoping I have got that out of my system now!). This a quick and easy knit, ideal for last minute gift making.
I used Tri'Coterie Aran Donegal Nep and Tri'Coterie Aran SWM for these samples and designed the hat to showcase indie and hand dyed yarns. A bit of plain stockinette to show off the colours, and a bit of lace to keep the knitter interested.
Wayside is available on Ravelry for $4. http://www.ravelry.com/patterns/library/wayside
I used Tri'Coterie Aran Donegal Nep and Tri'Coterie Aran SWM for these samples and designed the hat to showcase indie and hand dyed yarns. A bit of plain stockinette to show off the colours, and a bit of lace to keep the knitter interested.
Wayside is available on Ravelry for $4. http://www.ravelry.com/patterns/library/wayside
Wednesday, November 6, 2013
Gift-Along
I can't believe it is November...where has this year gone! If you have been into any shop lately you will have no doubt seen Christmas decorations up already....apparently the silly season is almost upon us.
If you have knitting on your gift giving agenda then check out the Indie designer Gift-Along. This is a Ravelry event - hundreds of indie designers have banded together for 2 weeks of discounted patterns, and 2 months of KALs/CALs.
Until 15 November 2013 you can get a 25% discount on participating patterns by using the code "giftalong". You can see all the designers/patterns involved by checking out the giftalong group on Ravelry: http://www.ravelry.com/groups/indie-design-gift-a-long
The KnitAlong will run until the end of the year and there are hundreds of great prizes up for grabs so get involved and share your plans, wips and FOs with the group.
All my individual patterns are included in the promotion :)
Happy Knitting!
If you have knitting on your gift giving agenda then check out the Indie designer Gift-Along. This is a Ravelry event - hundreds of indie designers have banded together for 2 weeks of discounted patterns, and 2 months of KALs/CALs.
Until 15 November 2013 you can get a 25% discount on participating patterns by using the code "giftalong". You can see all the designers/patterns involved by checking out the giftalong group on Ravelry: http://www.ravelry.com/groups/indie-design-gift-a-long
The KnitAlong will run until the end of the year and there are hundreds of great prizes up for grabs so get involved and share your plans, wips and FOs with the group.
All my individual patterns are included in the promotion :)
Happy Knitting!
Sunday, June 2, 2013
Hemlock and Sideline
I have been very slack on the blogging front and don't really have a good excuse. Now that my youngest child is at school I thought I might have more time to indulge in blogging, but it hasn't really worked out that way yet. I really don't know where the hours go (Ravelry, facebook and knitting probably).
Recently I released two new patterns. It has been a little while since I felt very inspired with the designing business so it has been nice to feel creative again and to get some designs published.
Sideline is a simple yet striking beanie pattern for the whole family. It uses a diagonal stitch I first started playing around with last year. It gives a squishy warm fabric that is perfect for a winter hat. The pattern is written in 6 sizes from NB to Adult for both DK and Worsted yarns. I really love this green one I made DH - he wears it all the time and there is no better compliment for a designer than her fussy husband wearing his hat all the time. After some deliberation I named it Sideline since the strong lines of the hat are the design feature and my prototypes had got plenty of wear on Saturday mornings at netball already. Sideline is available for $4US.
My other pattern released today is also a hat pattern - this time a slouchy beret style. Hemlock has an interesting cable texture which is actually achieved with slipped and twisted stitches. No cabling required! I made a pink one for myself as the first prototype and get compliments on it every time I wear it. It's a pretty hat that is an easy knit and you can modify the amount of slouch to suit. Hemlock is available for $3US.
Recently I released two new patterns. It has been a little while since I felt very inspired with the designing business so it has been nice to feel creative again and to get some designs published.
Sideline is a simple yet striking beanie pattern for the whole family. It uses a diagonal stitch I first started playing around with last year. It gives a squishy warm fabric that is perfect for a winter hat. The pattern is written in 6 sizes from NB to Adult for both DK and Worsted yarns. I really love this green one I made DH - he wears it all the time and there is no better compliment for a designer than her fussy husband wearing his hat all the time. After some deliberation I named it Sideline since the strong lines of the hat are the design feature and my prototypes had got plenty of wear on Saturday mornings at netball already. Sideline is available for $4US.
My other pattern released today is also a hat pattern - this time a slouchy beret style. Hemlock has an interesting cable texture which is actually achieved with slipped and twisted stitches. No cabling required! I made a pink one for myself as the first prototype and get compliments on it every time I wear it. It's a pretty hat that is an easy knit and you can modify the amount of slouch to suit. Hemlock is available for $3US.
Thursday, December 6, 2012
Goddess shawlette - beading photo tutorial
As promised here are some pictures of how to do the beading accent for the Goddess shawlette. I'm also going to include some other tips and things in case anyone is having difficulties.
First up - the beading. This uses the crochet hook method which places the bead on the stitch vertically so that it is visible on both sides of the fabric.
If you prefer a video this is the youtube clip I referenced in the pattern http://www.youtube.com/watch?v=t77pmmqCmr4 this is an excellent clear video and also shows how to use a piece of wire if you dont have a hook. I am sure you will be able to find other clips that will be helpful and other beading tutorials online too.
Ok. Here we go. Apologies for the quality of the pics, my camera is not great and its quite hard to knit and take photos at the same time!
First. Knit to the stitch where you want to place the bead.
Thread your bead onto your crochet hook. For this pattern you are using fingering weight yarn and a size 4mm 6/0 bead and a 1mm crochet hook. For one of my samples I used 3.75mm beads and 0.75mm hook and they worked Ok too.
Now slide the stitch off the needle and insert your hook into the loop.
Now the bit that is tricky to photograph! You need to pull the hook and loop through the bead so that the bead slides down over the stitch. This might take you a couple of goes at the beginning but you will soon work out if you need to angle the hook and how hard to pull so that the stitch comes through the bead.
You can now see that the bead is sitting down at the base of the stitch.
Then use your hook to replace the stitch back on the right hand needle and then knit it as normal.
Voila! The stitch is now worked and the bead is placed vertically on the stitch, visible on both sides of the fabric.
It is quite an easy technique and is particularly useful if you decide AFTER you have already cast on that you want to use beads. Its also a great technique for reversible patterns where you want to bead to show on both sides.
For those new to shawls the idea of having to block the shawl is probably quite daunting. It is not really difficult but does take a bit of time to rearrange the fabric and pins. Don't rush it :) The acolyte shawl with the lace body needs to be stretched quite a lot to open up the stitch. The looser you knit this the more you will be able to block it and the airier your shawl will be.
Here is a picture of the edging being blocked which I thought might be useful for people unsure how much to stretch the points.
The lace stitch in the acolyte version of the pattern requires a slipped stitch passed over a k1 and a yo. You need to make sure the yo is actually OVER the needle when you do the pass over. If it is just forward then the lace wont work. The instructions are asking you to pass the stitch over TWO stitches so make sure this is what is happening when you do the pass over.
And remember that the instructions inside of the ( ) is the pattern repeat. On row 5 of the increase section you will begin to add in more repeats - this continues throughout the increase section.
If you have any issues please contact me via the blog or on Ravelry (sweetp).
First up - the beading. This uses the crochet hook method which places the bead on the stitch vertically so that it is visible on both sides of the fabric.
If you prefer a video this is the youtube clip I referenced in the pattern http://www.youtube.com/watch?v=t77pmmqCmr4 this is an excellent clear video and also shows how to use a piece of wire if you dont have a hook. I am sure you will be able to find other clips that will be helpful and other beading tutorials online too.
Ok. Here we go. Apologies for the quality of the pics, my camera is not great and its quite hard to knit and take photos at the same time!
First. Knit to the stitch where you want to place the bead.
Thread your bead onto your crochet hook. For this pattern you are using fingering weight yarn and a size 4mm 6/0 bead and a 1mm crochet hook. For one of my samples I used 3.75mm beads and 0.75mm hook and they worked Ok too.
Now slide the stitch off the needle and insert your hook into the loop.
Now the bit that is tricky to photograph! You need to pull the hook and loop through the bead so that the bead slides down over the stitch. This might take you a couple of goes at the beginning but you will soon work out if you need to angle the hook and how hard to pull so that the stitch comes through the bead.
You can now see that the bead is sitting down at the base of the stitch.
Then use your hook to replace the stitch back on the right hand needle and then knit it as normal.
Voila! The stitch is now worked and the bead is placed vertically on the stitch, visible on both sides of the fabric.
It is quite an easy technique and is particularly useful if you decide AFTER you have already cast on that you want to use beads. Its also a great technique for reversible patterns where you want to bead to show on both sides.
For those new to shawls the idea of having to block the shawl is probably quite daunting. It is not really difficult but does take a bit of time to rearrange the fabric and pins. Don't rush it :) The acolyte shawl with the lace body needs to be stretched quite a lot to open up the stitch. The looser you knit this the more you will be able to block it and the airier your shawl will be.
Here is a picture of the edging being blocked which I thought might be useful for people unsure how much to stretch the points.
The lace stitch in the acolyte version of the pattern requires a slipped stitch passed over a k1 and a yo. You need to make sure the yo is actually OVER the needle when you do the pass over. If it is just forward then the lace wont work. The instructions are asking you to pass the stitch over TWO stitches so make sure this is what is happening when you do the pass over.
And remember that the instructions inside of the ( ) is the pattern repeat. On row 5 of the increase section you will begin to add in more repeats - this continues throughout the increase section.
If you have any issues please contact me via the blog or on Ravelry (sweetp).
New pattern: Goddess
I loaded a new pattern on Ravelry yesterday.
Goddess Shawlette.
This is a pattern I designed as part of a collaboration with Hannah from Red Riding Hood Yarns for her Spring Shawl Club 2012. I was delighted to be asked to part of the club and had a lot of fun coming up with something that would fit the Goddess theme of the club.
Goddess is a long narrow shawlette/scarf that is knit sideways. The edging is a pretty lace that also features an optional bead accent and the body is a lace background stitch that opens up beautifully to make an ethereal light and airy shawl.
The pattern is exclusive to club members for six months at which time I will make it available to the public. Hannah is raffling off a club package next week so if you would like to get your hands on the pattern and the awesome yarn/swag then keep an eye on her facebook page for details.
https://www.facebook.com/RedRidingHoodYarns
Goddess Shawlette.
This is a pattern I designed as part of a collaboration with Hannah from Red Riding Hood Yarns for her Spring Shawl Club 2012. I was delighted to be asked to part of the club and had a lot of fun coming up with something that would fit the Goddess theme of the club.
Goddess is a long narrow shawlette/scarf that is knit sideways. The edging is a pretty lace that also features an optional bead accent and the body is a lace background stitch that opens up beautifully to make an ethereal light and airy shawl.
The pattern is exclusive to club members for six months at which time I will make it available to the public. Hannah is raffling off a club package next week so if you would like to get your hands on the pattern and the awesome yarn/swag then keep an eye on her facebook page for details.
https://www.facebook.com/RedRidingHoodYarns
Subscribe to:
Posts (Atom)